


Integration with Zoho Invoice
Developer Guide / Integrations / Integration with Zoho InvoiceIntergaration with Zoho Invoice - General information
To connect to Zoho Invoice, you need to follow a series of steps
Read the following instructions carefully and follow the steps indicated. Given that the Zoho interface does not have a Russian version, we give examples in English.
At the end of the setup, do not forget to click the green "Save" button.
1) To integrate your account with the Zoho system, you need to have a "Zoho" account and connect to the "Zoho Invoice" service there
If you don't already have one, register with Zoho: https://accounts.zoho.eu/register.
We recommend registration in the European segment of Zoho - zoho.eu.

2) If you already have an account, then you can enter it through the Zoho user account: https://accounts.zoho.eu.
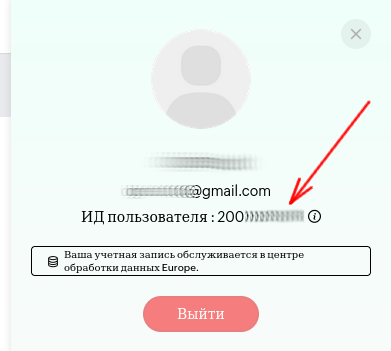
After entering the account, click on the round icon in the upper right corner and, in the panel that opens, find the "User ID".
Copy this number and paste it into the "User ID" field on the settings page.
3) Log in to the Zoho developer account: https://accounts.zoho.eu/developerconsole.
In the developer's personal cabinet, you will need to install our application "e-Cont.md : e-Invoicing"
To do this, click on the link "ADD CLIENT" at the top right

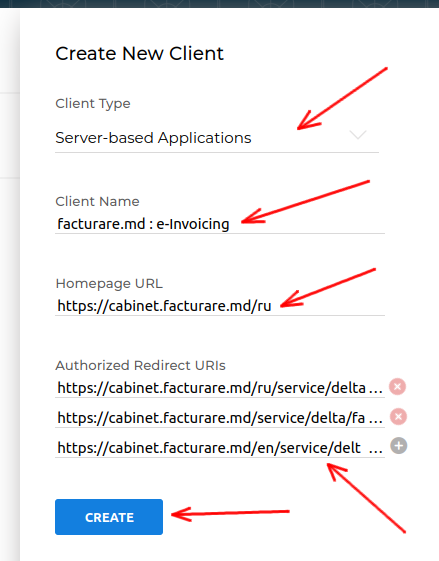
4) Select "Server-based Applications" and fill in the fields:
Client Name: e-Cont.md : e-Invoicing
Homepage URL: https://my.e-Cont.md/ru
Authorized Redirect URIs - insert three links (for each language version of the account) from the settings:
Return link address (ru) / (ro) / (en)
Take the data to fill in the fields from the settings on the settings page.
Click on the "CREATE" button
5) After creating the application
you will have the opportunity to look in the application settings "e-Cont.md : e-Invoicing" in the Client Secret tab, the settings that need to be made in the parameters on the settings page:
Value from Client ID - enter in the "Client ID" field
Client Secret value - enter in the "Client secret code" field

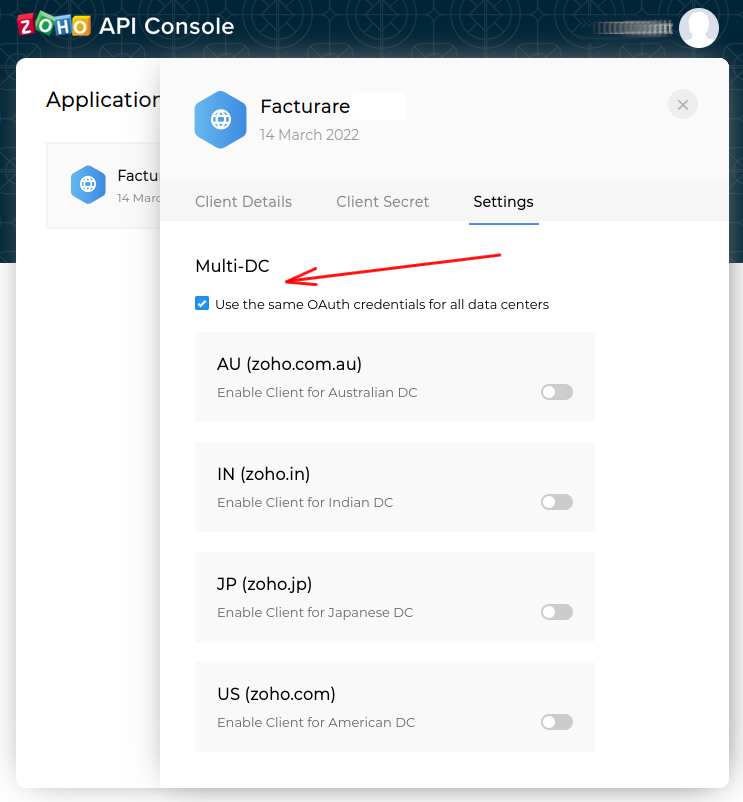
6) In the "Settings" tab, check the "Use the same OAuth credentials for all data centers" checkbox and confirm the changes
This will allow you, if necessary, to move from a European data center to others.
7) Click the "Save" button
In this case, all the settings you have made will be saved in your account and will be used to interact with the Zoho system.
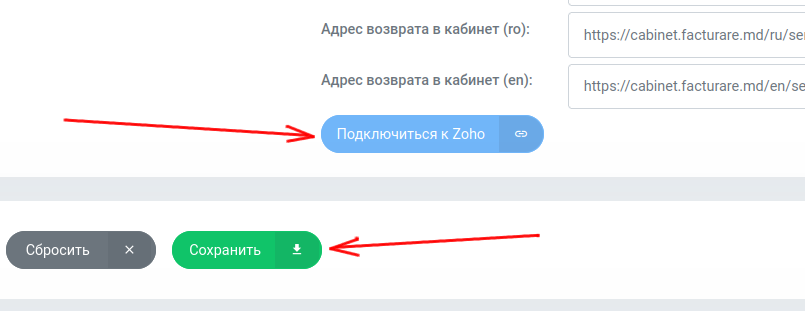
8) To complete the connection procedure, click the "Connect to Zoho" button
This will redirect the browser to a special Zoho server page, and then return to your account.
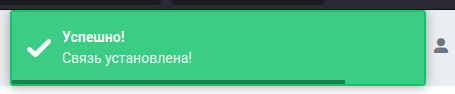
In this case, the e-Cont.md and Zoho Invoice systems will be interconnected. Upon successful connection, you will see a message: "Success! Connection established!"
For further successful work with the Zoho Invoice system, refer to the User Guide.