


e-Cont.md - Quick Start
User Guide / Account setup / e-Cont.md - Quick StartQuick Start
Terms and definitions:
1) Customer or Service user - the one who has registered in the system. Now, in essence, this is the seller.
2) Client, buyer or payer - the one who pays the seller (service user) for goods or services.
The payer is not necessarily the service user. The invoices for payment is available: in the cloud or by email (pdf).
In your personal account e-Cont.md:
- in the "Your customers" tab, a list of your customers is stored
- in the "Outgoing invoices" tab, invoices for payment that you have issued to your customers are stored.
3) Seller or supplier - a user of the e-Cont.md service when issuing an invoice for payment.
In your personal account e-Cont.md:
- in the "Sellers" tab, a list of your sellers is stored
- in the "Incoming invoices" tab, invoices for payment that other users of the service have issued to you are stored.
To start using the e-Cont.md service, just take a few simple steps.
Step 1: Registration
There are two ways to register with the e-Cont.md system:
- On the "Pricing" page, select the tariff that suits you and click the "Order" or "Create an account" button for the free tariff.
- Or go directly to the registration page. The choice of tariff will be offered to you after the registration procedure.
On the registration page, enter the email address with which you want to link your account in the e-Cont.md service and provide a password of at least 6 characters. For reliability, the password must be duplicated in the next field.
If there are errors during registration:
- Passwords don't match: Make sure both passwords are identical.
- Email already exists: This error means that the email address you entered is already associated with the e-Cont.md account. In this case, contact the e-Cont.md support service.
Step 2: Confirming your email address
In case of successful registration, you will receive an email with a special link to confirm your mail.
If you haven't seen a letter in your mailbox within a few minutes, check your SPAM folder.
Open the email and follow the link to verify your email.
After successful confirmation, you can enter your personal account in the e-Cont.md system.
Step 3: Sign in for the first time and fill in your credentials
When registering, your account will be assigned maximum permissions, i.e. you become the "Senior Manager".
You can:
- invite other managers
- manage access rights of other managers
The number of other managers is limited by the tariff you choose.
If you did not select a service package (tariff) on the site, then immediately after the first login you will be asked to select it.
After that, you will be taken to the page for the initial filling of credentials.
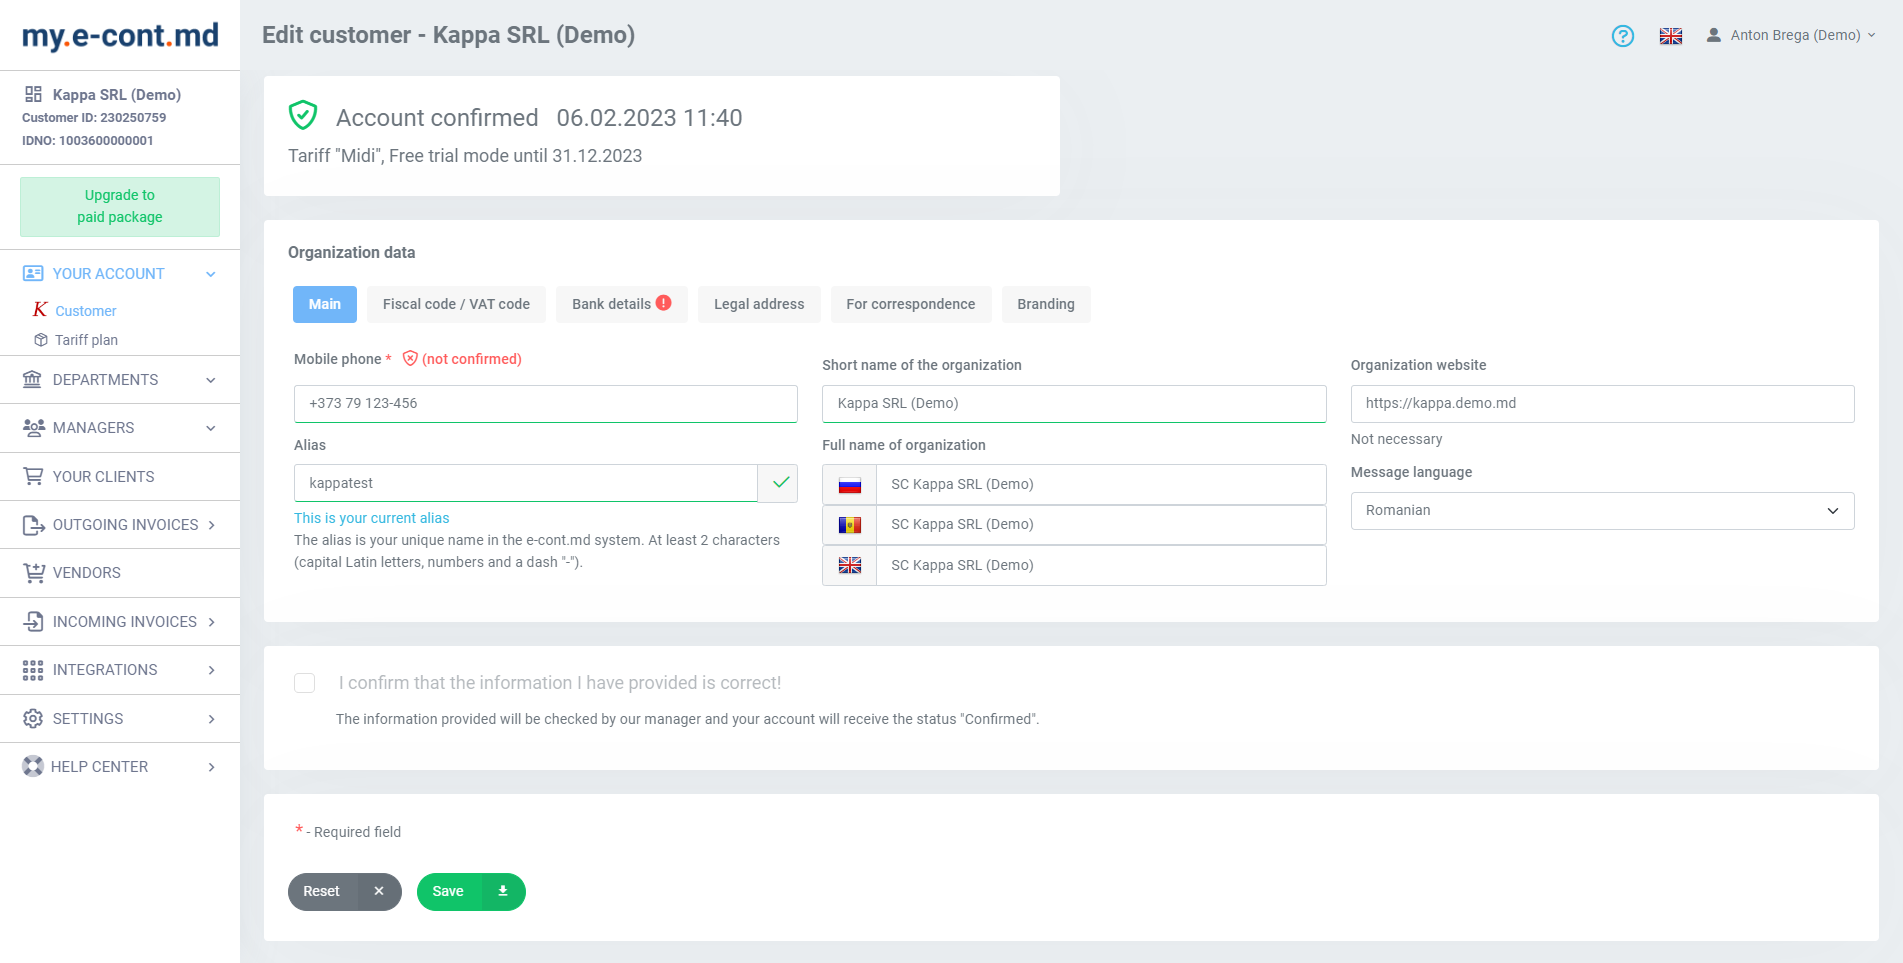
The main parameter that needs to be filled in is your name in the system (pseudonym). This is the internal name of your account in the system. It is unique within the e-Cont.md system.
You can use lowercase (small) Latin letters, numbers and the dash (minus) symbol "-". It is recommended that you select the simplified name of your company or your first and last name for the nickname if you are a sole proprietor.
If you accidentally entered an alias already registered in the system, you will receive a warning. You won't be able to continue with the setup until you enter a unique alias.
You can also enter the short and full name of your company (organization) in three languages and the website URL.
Company name: this is the name as your company will be mentioned in your e-Cont.md control panel and the name that your payers will see in invoices and other documents.
In the dedicated section, you can enter the fiscal codes of your company, VAT settings, if you are a VAT payer. As well as bank details, legal and postal address for correspondence.
Step 4: Account Confirmation/Verification
After successfully filling in the credentials, you must wait for the confirmation of your account from our side.
This is necessary to exclude erroneous and unauthorized actions in the system that could mislead market participants.
Confirmation will be made by managers of the e-Cont.md system, which will be notified to you by email.
Step 5: Departments Settings
By default, an account creates a main department called "Main Office".
If your tariff allows, then you can mine departments as needed.
If you have a large company, then you can make individual settings for departments, up to the settings for a separate legal entity.
Step 6: Invoices for payment issuing
After confirming your account and making minimal settings, you can issue invoices to your customers.
To do this, you must at least add the payer to your base of clients/payers.
After that, you can generate and send invoices for payment on behalf of each department separately.